Using Airfig
Airfig Setup
- In the Figma app, select Plugins > Find more plugins
Search for Airfig on the Figma plugin page and select Airfig in the listing. Press Run. Airfig will open in Figma, and is also added to the plugins menu. - In Airfig, press the Connect to Airtable button. This will launch Airtable — follow the onscreen steps to grant access to the Airtable Workspaces or individual Airfig Bases that you want to use with Airfig.
- After granting Airtable access, you will see the names of the selected Airtable bases in Airfig — you are now ready to start Airfigging!
Using Airfig
In this example, we are connected to the “Airfig Demo” Airtable base which contains a table called Countries of the World. Here’s the “South America” View of the table.
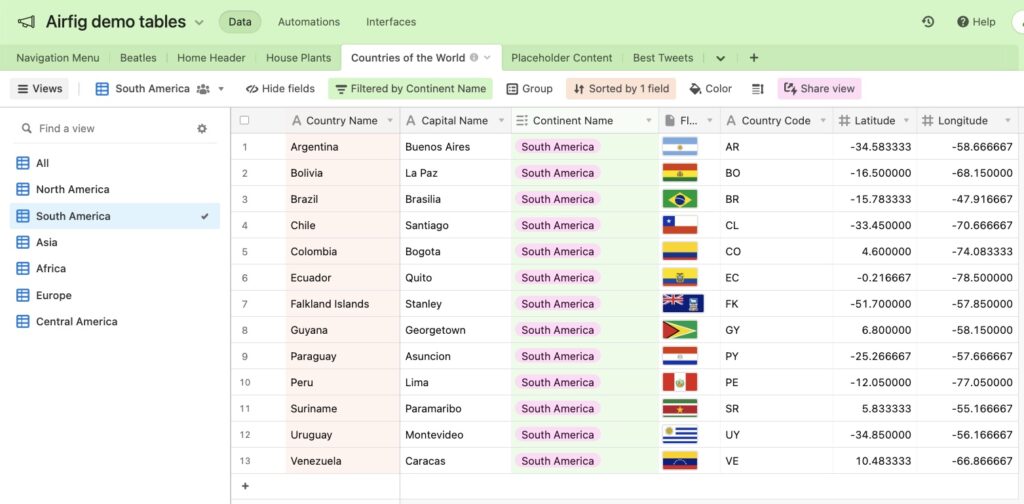
We will use this view to create a listing of these South American countries.
There are four simple steps to creating a layout with Airfig:
- Create a “template” to display each record — usually a component instance, with text and media layers for each field of the Airtable record.
- Place the template in a containing layer in your design (e.g. a content area or a sidebar)
- Define the layout in Airfig – how many rows and columns, spacing between items, etc.
- Press Run – the layout is created, each item displaying a different Airtable record.
Here are those 4 steps with some extra detail.
- Create a Figma template
You first create a template.Template is an Airfig term for the Figma element that Airfig will use for each item in the layout it will create. The template will be duplicated for each Airtable record, and populated with that record’s data.

The Figma instance that will be used as the template for the Country Listing.
It’s best practice that your template is an instance of a component, although a regular frame will work too. However, if you use an instance as the template, Airfig allows you to easily reset the generated layout back to that instance, so you can make adjustments and Run again.
- Put the template in a containing layer and select it
You can generate an Airfig layout right on the canvas, but typically you are going to place the template within your page layout and generate it in situ.
This layer in which you place the template is referred to as the Containing layer. Often, you will set the containing layer’s Vertical resize setting to Hug so it will expand to accommodate the layout’s items as they are created from the template.
Select the Template in Figma.
- Define the layout in Airfig
Next, open the Airfig plugin and select the Airtable South America View. Airtfig displays all your bases, so just select a Base, Table and a View in the top panel. In this case, the selections are Airfig Demo Tables > Countries of the World > South America.
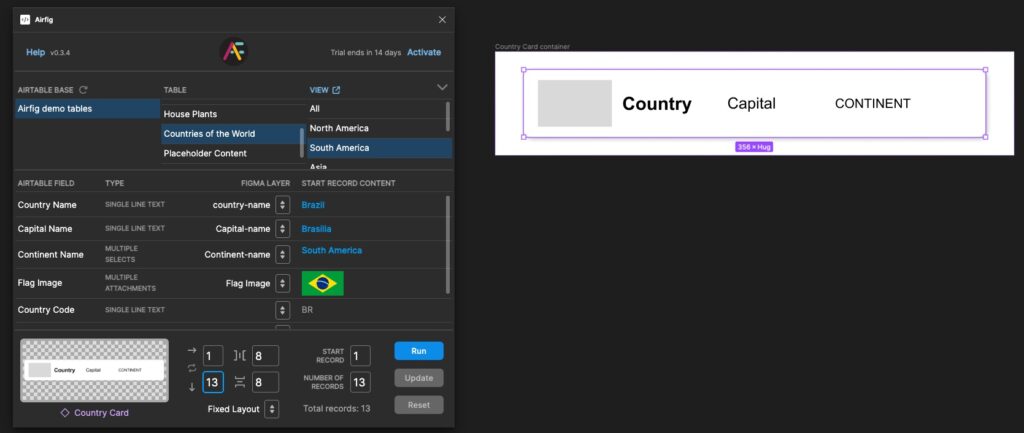
As shown above, all the template’s nested text and image layers will then display in the Figma Layer column of the center panel, and you can use their menus dropdowns to map (assign) each text or image layer to the matching Airtable field. In this case, the Figma layers were “auto-mapped” to the Airtable fields, because the layers have the same names as the fields.
In the lower panel, set the number of columns and rows (here, 1 and 13), a fixed or fluid layout type (here, fixed), and the number of records to be used (here, 1 to 13).
- Press Run
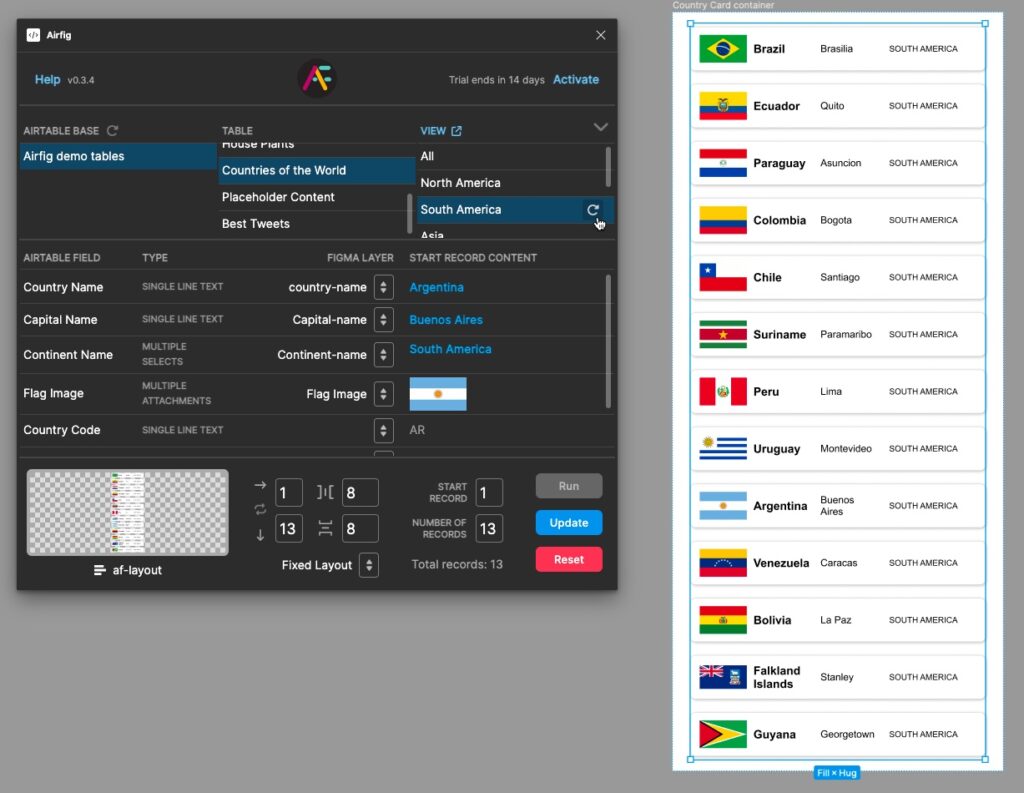
The 1 by 13 layout of cards is generated, each populated with a different Airtable record’s data.
Note that after the layout is created, the layout’s “wrapper” frame, added by Airfig in the layout process, is selected. This frame is named af-layout; when it’s selected, the Update and Reset buttons are active.
Update updates the layout with the current Airtable data without affecting the layout.
Reset resets to the layout to the instance from which the layout was generated, making it easy to repeatedly adjust the Airfig settings and Run again until the layout is just the way you want it.
Read more about the Airfig Interface. That’s it! Happy Airfigging!